
Install a Solar System at Home in 7 Steps
You'll start by evaluating your energy needs, analyzing past utility bills and identifying energy-intensive habits to determine the size and type of solar system required. Next, you'll choose the right equipment, selecting solar panels and inverters that meet your needs. After obtaining necessary permits, you'll prepare your roof, confirming it's structurally sound and free of obstacles. Then, you'll install solar panels, connect them to the grid, and track your energy production with a net meter. Finally, you'll monitor and maintain your system to guarantee peak performance. With these 7 steps, you'll be well on your way to utilizing the power of the sun - and there's more to investigate to maximize your system's potential.
Key Takeaways
- Assess your energy needs by analyzing past utility bills and identifying daily appliances and devices to determine the required solar system size.
- Choose the right equipment, including solar panels and inverters, considering factors like efficiency, cost, and monitoring capabilities for optimal system performance.
- Obtain necessary permits, including electrical, building, and zoning permits, and ensure compliance with safety standards before installation.
- Prepare your roof by assessing obstacles, determining areas with maximum sunlight, and verifying structural integrity to support solar panel weight.
- Install solar panels, connect to the grid, and set up a net meter to track energy production and consumption, enabling feeding of excess energy back into the grid.
Assess Your Energy Needs
Your energy consumption patterns play a significant role in determining the size and type of solar system you'll need to install at home.
To accurately assess your energy needs, you'll need to analyze your past energy consumption habits. Review your past utility bills to identify your average daily energy consumption in kilowatt-hours (kWh). This will give you a clear illustration of your energy usage patterns throughout the year.
Consider the appliances and devices you use daily, including refrigerators, air conditioners, lights, and electronics.
You'll also need to factor in any energy-intensive habits, such as running a home office or powering a swimming pool.
Choose the Right Equipment
With your energy needs assessment in hand, it's time to select the right equipment for your solar system. You'll need to choose the right solar panels, inverters, and mounting hardware to guarantee your system operates efficiently and effectively.
When it comes to solar panels, you'll need to decide on the type that's right for you. There are three main types: monocrystalline, polycrystalline, and thin-film. Each has its own advantages and disadvantages, which are summarized in the table below.
| Panel Type | Efficiency | Cost |
|---|---|---|
| Monocrystalline | High (15-20%) | High |
| Polycrystalline | Medium (12-15%) | Medium |
| Thin-Film | Low (7-14%) | Low |
Inverter options are also essential, as they convert the DC power generated by your solar panels into AC power for your home. You can choose from string inverters, microinverters, or power optimizers, each with its own benefits and drawbacks. Consider factors like cost, efficiency, and monitoring capabilities when making your decision.
Obtain Necessary Permits
You'll need to steer through the permit application process, which typically involves submitting a set of required documents to your local authority.
These documents may include your solar system design plans, installation details, and electrical diagrams.
Permit Application Process
The local government requires homeowners to obtain necessary permits before installing a solar system at home.
You'll need to determine which permits are required for your specific project. Typically, you'll need electrical, building, and zoning permits. Additionally, you may need specialized permits, such as a permit for connecting to the grid.
You should submit your permit application well in advance of your planned installation date. The application timeline can vary depending on your location and the complexity of your project. On average, it can take 2-4 weeks to receive approval, but it's not uncommon for the process to take up to 6 weeks.
Be prepared to provide detailed plans and specifications for your solar system, including the type and number of panels, the installation method, and the electrical connections.
You'll also need to provide proof of liability insurance and worker's compensation insurance for your installation team.
Once your application is approved, you can schedule your installation and start generating clean energy for your home.
Required Documents Checklist
To guarantee a smooth permit application process, gather all necessary documents beforehand.
You'll need to provide proof of ownership or a notarized letter from your landlord, if applicable. Make certain you have a detailed system design and layout, including the type and number of solar panels, mounting system, and inverter specifications.
Additionally, prepare a copy of your electricity bill to demonstrate your current energy usage. If you're exploring financing options, gather relevant documents, such as your credit report or income statements.
Take advantage of tax incentives by collecting receipts for the total system cost, including installation and equipment expenses. Don't forget to obtain a certification letter from the manufacturer, stating that the solar panels meet local building codes.
Having these documents ready will streamline the permit application process, saving you time and hassle.
Local Authority Approval
Several permits are required before commencing your solar system installation. You'll need to obtain approval from your local authority, which involves submitting your plans and waiting for their review. This step is essential to guarantee your system meets local regulations and safety standards.
You'll need to check with your local government to determine the specific permits required. Typically, you'll need an electrical permit, building permit, and possibly a zoning permit. Be sure to review your local regulations, as some areas have specific requirements for solar installations.
You may also want to investigate community incentives, such as tax credits or rebates, that can help offset the cost of your system.
Gather all necessary documents, including your system design plans, electrical schematics, and manufacturer specifications. Submit your application and pay the required fees.
Once approved, you'll receive a permit that allows you to proceed with the installation. Don't skip this step – failure to obtain the necessary permits can result in fines, penalties, or even system removal.
Prepare Your Roof
Rooftop obstacles like skylights, vents, and chimneys are limiting your solar panel placement options, so identify and assess them before deciding on a system layout.
You'll need to determine which areas of your roof receive the most sunlight throughout the day. Assess your roof's solar orientation, taking note of any shading from trees or neighboring buildings.
Next, inspect your roof's condition. Check for signs of wear, such as curled or missing shingles, and make any necessary repairs before installing your solar system.
You'll also want to verify your roof is structurally sound and can support the weight of the solar panels. Consider consulting a roofing professional if you're unsure about your roof's condition.
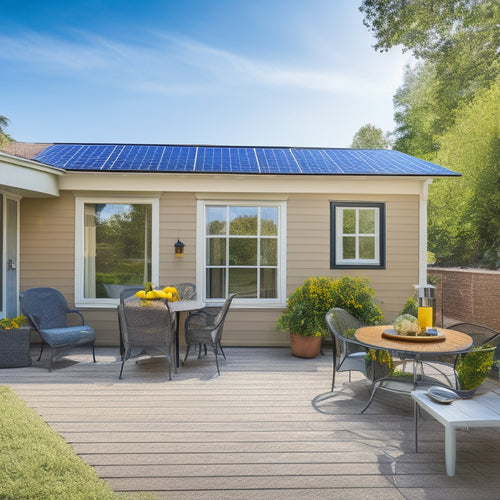
Install Solar Panels
Three key components make up a solar panel system: the panels themselves, the mounting system, and the electrical connections.
When it comes to solar panels, you've got a range of options to choose from, including monocrystalline, polycrystalline, and thin-film solar panels. Each type has its pros and cons, so it's crucial to research and select the one that best suits your energy needs and budget.
Once you've chosen your solar panels, it's time to install them. This involves mounting the panels on your roof, ensuring they're securely fastened and angled for maximum energy absorption.
The mounting system typically includes racking, clamps, and flashing to seal any gaps. You'll also need to connect the panels electrically, using specialized wiring and connectors.
Installation costs vary depending on the size of your system, the type of panels you choose, and the complexity of the installation.
On average, you can expect to pay between $2.50 and $3.50 per watt, with a typical residential system ranging from 5-10 kilowatts.
Connect to the Grid
With your solar panels installed, you're now ready to connect them to the grid, a crucial step in utilizing the power of the sun to energize your home.
This grid connection will enable you to feed excess energy back into the grid and offset your energy consumption. To initiate the connection process, you'll need to notify your utility company and schedule a grid connection inspection.
During this inspection, a representative will verify that your system meets safety and regulatory standards.
Once approved, you'll receive permission to operate (PTO) your system, allowing you to start generating electricity.
You'll also need to install a net meter, which tracks the energy you produce and consume. This meter will help you monitor your energy independence, giving you a clear overview of your energy usage and production.
With a successful grid connection, you'll be well on your way to achieving energy independence and reducing your reliance on the grid.
Monitor and Maintain
You'll want to track your solar system's performance to guarantee it's generating the expected amount of energy.
By monitoring your system's energy output, you'll be able to identify any potential issues and make data-driven decisions to optimize its performance.
This analysis will help you pinpoint areas for improvement, allowing you to maximize your system's energy production and savings.
System Performance Tracking
As your solar system begins generating electricity, monitoring its performance becomes essential to secure ideal energy production and identify potential issues. You'll want to track your system's performance metrics, including energy output, voltage, and current, to confirm it's operating at optimal levels. This data will help you identify areas for system enhancement, allowing you to make adjustments to maximize your energy output.
You can use monitoring systems, such as data loggers or remote monitoring platforms, to track your system's performance in real-time. These systems often provide alerts and notifications when performance deviates from expected levels, enabling you to take corrective action quickly.
By regularly reviewing your system's performance metrics, you can detect potential issues before they become major problems, reducing downtime and confirming your system operates at peak efficiency.
Regular system performance tracking also helps you identify opportunities for improvement, such as cleaning or replacing components, to maintain optimal energy production. By staying on top of your system's performance, you can confirm it continues to provide reliable, clean energy for your home.
Energy Output Analysis
Most solar panels produce between 250-400 watts of electricity per hour, and your system's energy output analysis will help you determine if it's meeting its expected capacity.
This analysis is essential to guarantee your solar system is operating efficiently and providing you with the maximum amount of power.
To get the most out of your solar system, you'll want to monitor its performance regularly.
Here are 4 key aspects to focus on:
-
Solar energy efficiency: Check if your system is producing the expected amount of energy based on its capacity and the amount of sunlight it receives.
-
Panel orientation: Verify that your panels are installed at the ideal angle to maximize energy production.
-
Shading analysis: Identify any potential shading issues that could be affecting your system's performance.
- Inverter performance: Verify your inverter is functioning correctly and not reducing your system's overall energy output.
Frequently Asked Questions
Can I Install Solar Panels Myself to Save Money?
You can attempt a DIY solar installation to save money, but be aware that it requires technical knowledge and adherence to safety standards; considering cost saving tips against potential risks and warranty voidance is essential before deciding to go solo.
How Long Does It Take to Recoup the Cost of a Solar System?
When you break even, you're in the black! Your solar system's payback period depends on cost factors like installation, maintenance, and local incentives, but on average, you'll recoup the cost in 5-7 years, and then it's smooth sailing, saving you money for years to come.
Will Solar Panels Increase My Property Value?
You'll be happy to know that your solar investment will likely enhance your property value, as a property appraisal will reflect the added value of generating clean energy, making your home more attractive to potential buyers.
Can I Use Solar Power to Charge My Electric Vehicle?
Ah, you want to be a superhero, saving the planet and your wallet? You can, by utilizing solar power to charge your electric vehicle! With solar charging, you'll tap into your home energy, reducing reliance on the grid and fueling your eco-friendly ride.
Are Solar Panels Resistant to Extreme Weather Conditions?
You'll be relieved to know that solar panels are built to withstand extreme weather conditions, boasting impressive durability in the face of heavy rain, hail, and intense heat, ensuring peak energy production even in harsh environments.
Related Posts
-

Why Go Green With Automotive Products Online?
By switching to eco-friendly automotive products online, you're taking a significant step towards reducing your carbo...
-
10 Tips to Buy Affordable Solar Panels Online
When purchasing affordable solar panels online, you'll want to research reputable retailers, compare prices, and chec...
-

What Are the Average Cost Savings of Solar Panels
You can expect to save between $400 and $1,000 per year on your electricity bills with solar panels, which translates...


